
To install laminate flooring, check that the subfloor is flat and dry, let the boards settle in the room, lay the underlay, leave an expansion gap at every wall, then click the planks together row by row. Many problems start with the preparation, not the clicking. Knowing how to install laminate flooring in a UAE home step by step also means knowing what to check on concrete and when a professional is the safer choice. Most figures come from EGGER’s published guidance; the instructions packed with your boards always take priority.
Laminate Flooring Installation: What to Check Before You Open a Box
A good result starts before the first plank. Read the leaflet inside the pack, because gap sizes, underlay and moisture limits differ by product. If you are choosing boards, Floorna lists its Egger laminate flooring with the thickness and class on each product page, such as the 8/33A+ label on Natural Casella Oak Aqua+ (code EL2152).
Measure the room and add an allowance for cut ends. Floorna’s guide on how to measure a room for flooring covers the method, and about 10% extra is a common allowance for straight layouts, with more for diagonal or tight rooms.
Then check the subfloor. EGGER’s FAQ asks for a dry, clean, firm, crack-free and even subfloor, and its laying guide quotes a tolerance of 2 mm over every 100 cm, so use the figure in your own board’s instructions. High spots can be sanded down and low spots filled with levelling compound. Moisture must meet the limit in the product’s instruction manual, measured with the method and unit the manufacturer specifies; a reading from an ordinary moisture meter is not proof of acceptance on its own. The room should be at least 18°C, the floor surface at least 15°C, and air humidity between 40% and 70%. One practical way to get there in a UAE home is to run the air conditioning beforehand and check the room with a hygrometer.
Step by Step: How to Install Laminate Flooring in a Prepared Room
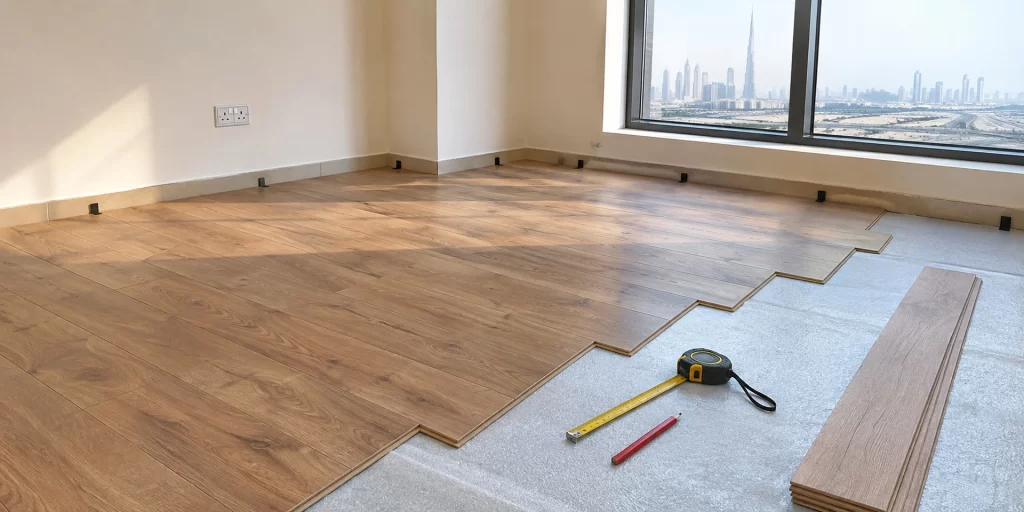
Once the room passes those checks, the order for how to install laminate flooring is simple.
- Acclimatise the boards. EGGER’s FAQ gives 48 hours in the room of installation, and your board’s leaflet says whether the packs stay closed or are opened.
- Clear and clean the subfloor. Remove skirting, old flooring, nails and dust, and fix any high or low spots.
- Lay the underlay, taping seams as the underlay maker directs. Smooth out wrinkles, because creases telegraph through the boards.
- Set the expansion gap. EGGER’s FAQ requires movement joints of 8 to 10 mm for its floating floors, at walls, door frames, pipes and pillars, and spacers keep the gap constant. Other brands and systems can differ, so use your product’s figure.
- Start the first row where your board’s instructions say; the longest wall is a common choice, not a rule. Check the row is straight, then continue row by row, staggering the end joints by at least your product’s minimum offset. EGGER’s FAQ requires at least 200 mm for its boards in general and at least 500 mm for its LONG format, while herringbone layouts and other brands follow their own instructions.
- Trim door frames so planks can slide under them, and break the floor at doorways with a door bar.
- Fit the last row, remove spacers, and cover the gap with skirting or profiles.
Before you move furniture back, check that every wall gap is covered, that no plank rocks, and that doors open freely. Knowing how to install laminate flooring is mostly knowing what to inspect at each stage, so photograph the moisture reading and the pack labels for your records.
How to Install Laminate Flooring for Beginners: Tools and Common Mistakes
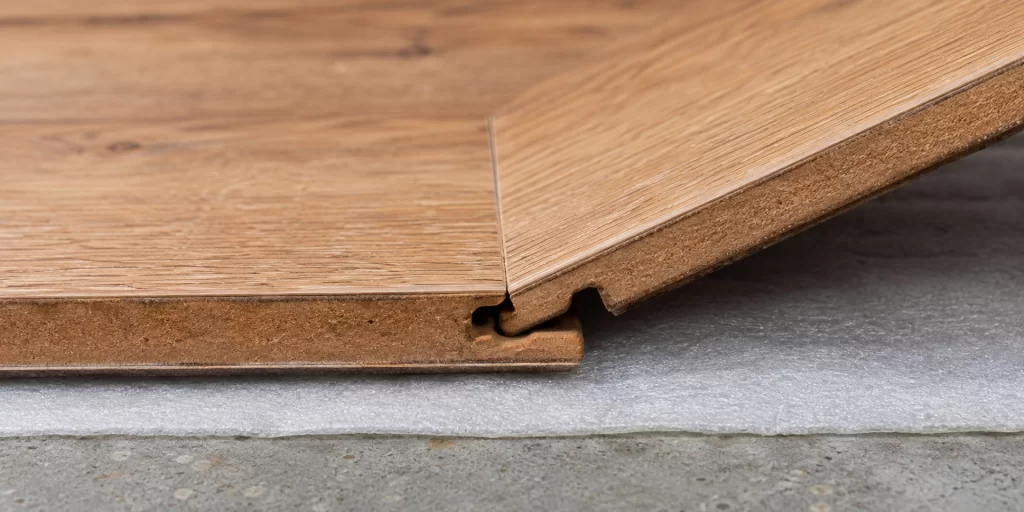
A first-time installer needs a tape measure, spacers, a tapping block, a pull bar, a saw suited to laminate, a level and a pencil. Practice the click on offcuts before you start, and lay the first three rows dry so you can see whether the last row will end up uncomfortably thin. If it will, trim the first row to balance them.
EGGER lists the mistakes that cause most problems: leaving too little gap at walls and in doorways, which can lead to buckling or gaps between planks; skipping a moisture test on a new build; and leaving the underlay wrinkled or its seams untaped. Add one more: rushing the first two rows. If those are crooked, the whole floor follows.
Installing Over Concrete in a UAE Home
Concrete and screed are mineral subfloors, and EGGER says you should always install a moisture barrier on them, such as an underlay with an integrated vapour barrier. For its laminate floors, EGGER’s FAQ specifies a moisture protection film with an SD value of at least 75 m over the entire surface, and says not to use one on wooden subfloors. Silenzio Duo (1.5 mm) is the EGGER underlay the guide names for mineral floors. If you want to know how to install laminate flooring over concrete in a villa or ground-floor flat, the sequence is: test moisture, level the slab if needed, fit the barrier with taped seams, then lay the planks as above. A newly screeded slab must first reach the moisture limit in the instructions, because a damp slab stays unsafe however carefully you follow the steps for how to install laminate flooring.
An underlay and a vapour barrier are not the same thing. The underlay cushions the board and helps with sound; the barrier stops moisture rising from the slab. Some underlays combine both, so read the label. EGGER notes that most European makers recommend underlay of 1 to 3 mm, and the installation instruction takes precedence.
Board and underlay add up to the finished height, which matters at doors. Floorna’s guide to laminate flooring thickness explains how to check clearances before you buy.
Can You Lay Laminate Without Underlay?
Searches for how to install laminate flooring without underlayment come down to one question: does the board already carry a layer? Some laminate has an underlay attached to the back; EGGER’s FAQ says boards with Silenzio laminated on the back need no additional sound mat. Even so, on concrete the moisture barrier is still required under EGGER’s guidance. If your board’s technical sheet shows no attached layer, do not skip it, because that layer supports the floor and, on some products, protects it from moisture.
Stairs and Other Jobs Better Left to a Professional
Stairs are not covered by the floating-floor steps above. How to install laminate flooring on stairs depends on the manufacturer’s stair instruction for that exact product, including the nosing and the fixing method. EGGER’s FAQ, for example, gives no stair method and only asks for an 8 to 10 mm joint where the floor meets a stair. Finding no stair instructions means you have no manufacturer guidance, which is not the same as the product being banned on stairs, so ask the manufacturer in writing before you proceed. A poorly fixed stair tread is a trip hazard, not a cosmetic flaw.
Whatever the room, the rule for how to install laminate flooring stays the same: the manufacturer’s written instruction for your board outranks any general guide, including this one.
Call a professional when the subfloor is outside tolerance, a moisture reading is above the product’s limit, or the layout has several doorways and long runs.
Prefer a professional fitter? Floorna covers laminate work within its flooring installation Dubai service for homes and businesses, so share your room details and ask the team which system suits your subfloor.
Frequently Asked Questions
1. Does laminate need an expansion gap at every wall?
Yes. The boards need room to expand, so leave a gap at walls, door frames, pipes and pillars and keep it open with spacers until the skirting is fitted. The size depends on the product, so use the figure in your board’s leaflet.
2. How long should laminate boards acclimatise?
Long enough for the boards to adjust to the room where they will be laid. Your board’s leaflet states the period and whether the packs stay closed, and the room should already be within the temperature and humidity range it gives.
3. How far apart should plank end joints be?
Stagger them so no two neighbouring rows line up. The minimum offset is set by the product, so use the figure in your board’s instructions rather than a general rule.